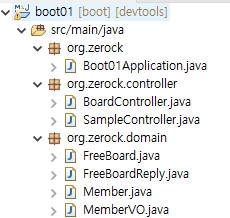
1. 도메인 작성
package org.zerock.domain;

import java.sql.Timestamp;

import lombok.AllArgsConstructor;
import lombok.Data;

@Data
@AllArgsConstructor
public class MemberVO {

	private int mno;
	private String mid;
	private String mpw;
	private String mname;
	private Timestamp regdate;

}
2. 컨트롤러 작성
package org.zerock.controller;
import java.sql.Timestamp;
import java.util.ArrayList;
import java.util.List;
import org.springframework.stereotype.Controller;
import org.springframework.ui.Model;
import org.springframework.web.bind.annotation.GetMapping;
import org.zerock.domain.MemberVO;
@Controller
public class SampleController {
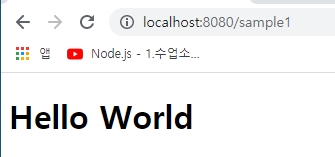
@GetMapping("/sample1")
public String sample1(Model model) {
model.addAttribute("greeting", "Hello World");
//여기에서 greeting과 Hello World는 각각 <Key, Value>이다.
return "index1";
}
@GetMapping("/sample2")
public String sample2(Model model) {
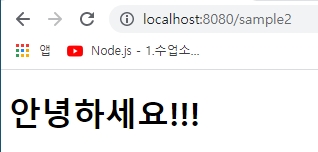
model.addAttribute("intro","안녕하세요!!!");
return "index2";
}
@GetMapping("/sample3")
public String sample3(Model model) {
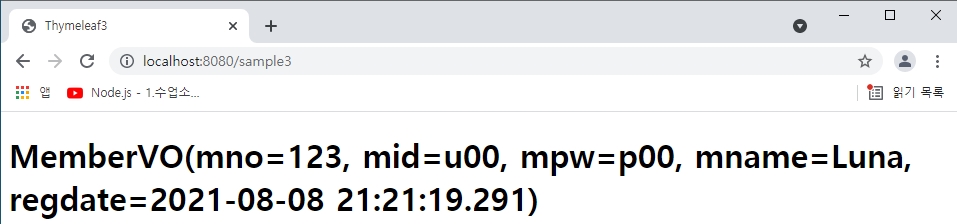
MemberVO vo = new MemberVO(123, "u00", "p00", "Luna",
new Timestamp(System.currentTimeMillis()));
// 위 vo에 입력된 값들은 웹페이지에 출력될 값들이다.
model.addAttribute("vo", vo);
return "index3";
}
@GetMapping("/sample4")
public String sample4(Model model) {
List<MemberVO> list = new ArrayList<>();
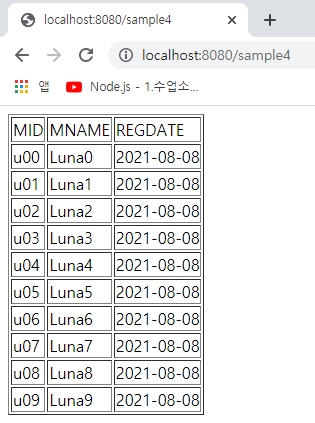
for (int i = 0; i < 10; i++) {
list.add(new MemberVO(123,"u0"+i,"p0"+i,"Luna"+i ,
new Timestamp(System.currentTimeMillis())));
}
// for문에 있는 값들은 웹페이지에서 도표로 출력된다.
model.addAttribute("list", list);
return "index4";
}
@GetMapping("/sample5")
public String sample5(Model model) {
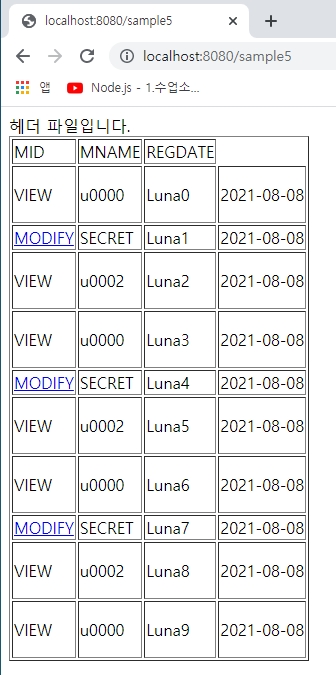
List<MemberVO> list = new ArrayList<>();
for (int i = 0; i < 10; i++) {
list.add(new MemberVO(i, "u000"+i%3, "p0000"+i%3, "Luna"+i,
new Timestamp(System.currentTimeMillis())));
}
model.addAttribute("list", list);
return "index5";
}
}3. HTML 작성하기
<!DOCTYPE html>
<html xmlns:th="http://www.thymeleaf.org">
<head>
<meta charset="EUC-KR">
<title>Thymeleaf3</title>
<meta http-equiv="Content-Type" content="text/html; charset=UTF-8" />
</head>
<body>
	<h1 th:text="${greeting}">Thymeleaf Test Page</h1>
</body>
</html>
1) index1.html
- 이전 게시물에서 application.properties의 설정이 spring.thymeleaf.cache=false로 되어 있어서 템플릿 페이지를 수정하고 브라우저에서 별도의 서버 재시작 없이 바로 확인이 가능하다.
- 'th:' 이후에 작성되는 속성은 HTML에서 사용하는 속성과 동일하게 사용할 수 있다.
<!DOCTYPE html>
<html xmlns:th="http://www.thymeleaf.org">
<head>
<meta charset="EUC-KR">
<title>Thymeleaf3</title>
<meta http-equiv="Content-Type" content="text/html; charset=UTF-8" />
</head>
<body>
	<h1 th:text="${intro}">Thymeleaf Test Page</h1>
</body>
</html>
2) index2.html
- index1.html을 조금 수정함, th:text는 태그의 내용물로 문자열을 출력하게 된다.
<!DOCTYPE html>
<html xmlns:th="http://www.thymeleaf.org">
<head>
<meta charset="EUC-KR">
<title>Thymeleaf3</title>
<meta http-equiv="Content-Type" content="text/html; charset=UTF-8" />
</head>
<body>
	<h1 th:text="${vo}">Thymeleaf Test Page</h1>
</body>
</html>
3) index3.html
- index1, index2를 조금 수정한 것이다.
<!DOCTYPE html>
<html xmlns:th="http://www.thymeleaf.org">

<head>
<meta http-equiv="Content-Type" content="text/html; charset=UTF-8" />
</head>
<body>

	<table border="1">
		<tr>
			<td>MID</td>
			<td>MNAME</td>
			<td>REGDATE</td>
		</tr>

		<tr th:each="member : ${list}">
			<td th:text="${member.mid}"></td>
			<td th:text="${member.mname}">Doe</td>
			<td th:text="${#dates.format(member.regdate, 'yyyy-MM-dd')}"></td>
		</tr>

	</table>

</body>
</html>
4) index4.html
- #dates.format()은 Thymeleaf의 보조 객체로, 날짜와 관련된 처리에 유용
<!DOCTYPE html>
<html xmlns:th="http://www.thymeleaf.org">

<head>
<meta http-equiv="Content-Type" content="text/html; charset=UTF-8" />
</head>
<body>
	<table border="1" th:with="target='u0001'">
		<tr>
			<td>MID</td>
			<td>MNAME</td>
			<td>REGDATE</td>
		</tr>

		<tr th:each="member : ${list}">
			<td th:if="${member.mid}">
				<a href="/modify" th:if="${member.mid == target}"> MODIFY</a>
				<p th:unless="${member.mid == target}">VIEW</p>
			</td>
			<td th:text="${member.mid == target ?'SECRET':member.mid}"></td>
			<td th:text="${member.mname}">Doe</td>
			<td th:text="${#dates.format(member.regdate, 'yyyy-MM-dd')}"></td>
		</tr>

	</table>

</body>
</html>
5) index5.html
- index4.html에서 조금 변형한 것이다.
- target이라는 변수와 값을 비교한다.
4. 결과
5. Thymeleaf 링크 처리 및 레이아웃 기능(index5.html을 변형)
<!DOCTYPE html>
<html xmlns:th="http://www.thymeleaf.org">

<head>
<meta http-equiv="Content-Type" content="text/html; charset=UTF-8" />
</head>
<body>
	<div th:insert="~{fragments/header::header}"></div>

 	<ul>
		<li><a th:href="@{http://localhost:8080/sample1}"></a>sample1</li>
		<li><a th:href="@{/sample1}">sample1</a></li>
		<li><a th:href="@{~/sample1}">sample1</a></li>
	</ul>

	<div th:insert="~{fragments/footer::footer}"></div>

</body>
</html>
1) sample1을 경로로 이용한다.
2) @{http://..}로 시작하는 코드는 절대 경로 처리에 사용된다
3) '@{/sample1}'에는 현재 실행되는 컨텍스트의 경로가 반영된다.
4) Thymeleaf 레이아웃을 만든다.
- th:insert를 이용해 페이지의 헤더와 푸터 처리
<!DOCTYPE html>
<html xmlns:th="http://www.thymeleaf.org">
<div th:fragment="footer">
Footer 파일입니다.
</div>
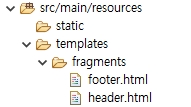
</html>footer.html 작성(링크 아래쪽에 표시될 내용이다.)
<!DOCTYPE html>
<html xmlns:th="http://www.thymeleaf.org">
	<div th:fragment="header">
	헤더 파일입니다.
	</div>
</html>
header.html 작성(링크 위쪽에 표시될 내용이다.)
5) 결과
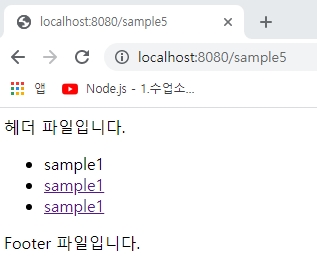
header.html이 위쪽에 생성되고, footer.html이 아래쪽에 생성되었다. 그리고 sample1을 클릭하면 표시한 링크로 이동한다.
'Spring_boot > Project' 카테고리의 다른 글
| [Spring] 웹 애플리케이션 제작 (0) | 2021.08.16 |
|---|---|
| [Spring] Spring MVC를 이용한 통합 (0) | 2021.08.10 |
| [Spring] Thymeleaf 사용하기 (0) | 2021.08.07 |
| [Spring] 다양한 연관관계 처리 (0) | 2021.08.07 |
| [Spring] Spring JPA 이용한 단순 게시물 처리 (0) | 2021.07.31 |